Monday, March 17, 2014

Let it Go! Elsa Inspired Braid Up-Do.


Let it Go! A quick, sophisticated up-do braid tutorial. Perfect for the littlest girl to the oldest woman. 


Being a mom of three, I don't have time to spend hours on my hair. I love up-dos that take 5 minutes or so, and that is exactly what this is! At least you will look put together, even if your house and children aren't, right? :0)

***I must add a caveat about my hair: I have a lot of fine hair--not thick hair, just a LOT of hair (I have the thinnest of all my 3 sisters and mom!) and it hits just below my bra strap across my back. I have tried some up-dos with success and some with failure because my hair is obviously different from theirs in one way or another...


Okay, onto the details! I like to start with damp hair in order to get a good grip and so that the braid holds together well. Pull all of your hair to one side. I am left-brained, so I always pull mine to my right side. I know Elsa's is the opposite, but she must be a right-brainer--or maybe just the animator is (or is he/she left-brained and mirroring...?) Sorry, tangent queen here! Take a chunk of hair at the top of your head, about at the outside corner of the eye furthest away from the direction you are heading. Start twisting away from your forehead. I don't part it or make it exact, just start twisting and grabbing more hair along the way.

Twist all the way down to your ear and hang onto it tight!


Here's where we start to braid. The remaining hair needs to be divided in half. I was taking these pictures by my self, so it might look crazy and I may or may not have gotten a cramp in my hand trying to hold it all in place. Please, for my sake, if you have two hands, use them both!


Star the braid by crossing your twisted hair over the center one first and then continue to braid as usual, securing the end with a hair tie or elastic. FOE hair ties are my fav :0)


You can loosen the twist on top by gently pulling at it--gives it a less structured look.


Now, you can leave it like this for the "let it go" version, or give it a twist for the up-do.


Start by twisting the braid toward the back of your head, away from your face. Here's where the length and amount of hair play a big part. Your braid might be longer or shorter than mine, but you get the idea. Keep wrapping in a clockwise motion and tuck the tail in wherever it ends. Secure with a billion bobby pins!


Voila! There you have it!
 Here's a view from the other side...
 

Go celebrate the release of Frozen by giving yourself an Elsa-do!

Wednesday, March 12, 2014

Gift wrap tips and tricks!

Last week was my birthday and I thought it would be fun to show you some things I learned while working at Pottery Barn during Christmas and the wedding season so you can gift wrap more professionally. Now, by no means do I claim to actually be professionally trained in gift wrapping I was just forced to do it in the whirlwind of the retail world and I learned some great things on the way.


One thing I taught myself is that the materials that you wrap a present in are simply endless! Think outside of the box and use anything that coordinates with the gift. Plan ahead before you start wrapping. I love coordinating tissue paper, wrap, ribbon, tags and lay it all out to make sure I love it first!


Gift wrapping is my favorite part of Christmas and any reason to give a gift gets me excited to plan what I will encase it in. Now, I know some of you are going to say "But, it gets ripped off the second I hand it to them so what's the point?" In my experience, it gives the gift a sense of importance and makes it a little bit more special. It adds to the excitement of not knowing what's inside! Plus, I love getting beautifully wrapped gifts, don't you?


Okay, on to the tips! I thought I would just have lots of pictures of the process and show you what I think are the most important parts to take away from this. The lovely Dana with My Posh Designs came over to my house and photographed all of these for me! Thanks Dana!


Start by laying out everything you have and make sure you love it all together. My little sisters birthday was coming up and me and her share the same brain when it comes to creativity so I needed something special for her. I loved this Rifle Paper Co. notebook I found at Target and I had a matching wire headband so I decided to spin everything else off from those. I also was giving her some pink chevron earrings from my Etsy shop. Don't worry, she's already opened it and loved it so no spoilers here!


*Disclaimer* a lot of this you already know! So if it seems trivial, I'm not assuming you don't know how to wrap a gift I'm just going thru the whole process and adding in my tips along the way!


Place your tissue paper inside and fold in the side so it fits just right in the box.


This makes it easier to fold the paper back over your gift neatly.


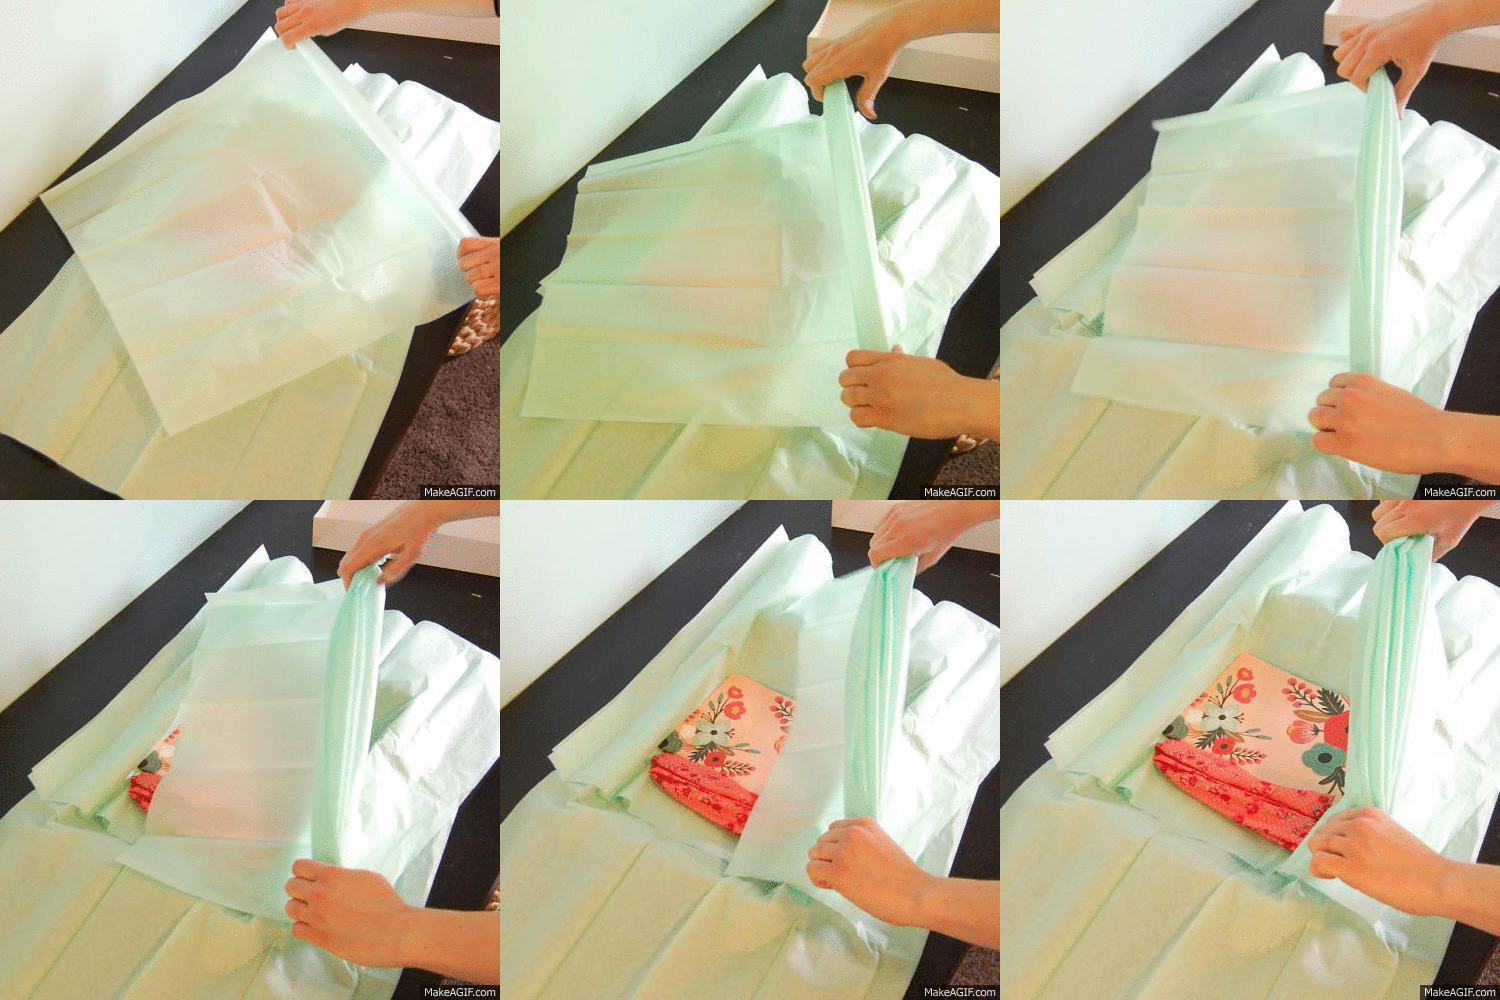
I didn't have a box that was the perfect size for the notebook so I took some extra tissue paper, do a quick accordian fold and place it on the sides as little "pillows".


accordian fold on Make A Gif
make animated gifs like this at MakeAGif


It looks nice and doesn't let your gift slide all over so the presentation is still pretty when the gift is open!


Fold in the long sides and then the ends.


I think it's nice to secure the tissue paper with something a little special. Today was just some washi tape but I do like to place a cute sticker with their initial on it just to make it personal.


Lay out your box


Flip it over with the paper and cut roughly an inch away. You don't need too much excess.


On the sides just make sure it goes just a tad past halfway up the sides. If you go too much over you'll have too much on the sides, you won't be able to make it look nice your gift will be sloppy and then your life is over. Just kidding! You can always trim it later, it's just harder to make a straight cut. I will admit, I did that on this gift so what you see in the picture is just a little too much.


Now here's the part I used to despise. I was TERRIBLE at wrapping! Until I discovered (now this is SO Important!) DOUBLE-SIDED TAPE! I'm sure this is no secret but it really changed my life when I was required to use it wrapping gifts at PB. It makes things easier and it looks like your gift was effortless! So, you got your double-sided tape ready? Alright, let's do this!

Lay your box upside down in the middle of the paper.


Pull one side to the center and place a piece of tape underneath.


Pull the other side taught but not too tight that you rip the paper! 


Can we talk paper for a minute? If you are using thin wrapping paper (sold in bulk around the holiday season or that cute paper sold in the dollar section at Target for example) it will tear really easily around your box.  For this reason and many others, I LOVE kraft paper! It does come in different weights so make sure you don't get something so thick that you can't even fold it. I get mine at Target and it's 60 gsm and about $3 a roll. I think it's just right but any higher quality gift wrap will give you similar results. Kraft paper is awesome too because I'm sure you've noticed on Pinterest but you can decorate it ANY way you want! You really can't go wrong.


Okay, I know, you need to get to that party and finish wrapping. 


After you put some tape under the other side turn your box one turn and put some on one of the inner flaps and tape it to the box, then tape the top flap on top of that. 


Make some little side wings


Pinch down the paper to make it nice and crisp!


Now here's where we get a little more fancy: make a crease on the corner by pinching your fingers along the edges. With thicker paper this just gives a beautiful finished look! We'll be doing this around all the corners eventually.


Now lift up the corner of the flap and place a piece of tape under there. When you fold your corners in it will be crisp and the paper won't try and move all around on you. 


After that tape your little side wings down.


Tape up the side and you now have a perfectly wrapped box! 


Here's where we go around all the edges pinching the corners


And here's a good look at the crisp edges and the beautiful detailing of this particular paper! It really is in the details people!!


Okay anything goes from here! I had some tulle and some pink pom poms I thought were really cute together. Start on the top


Cross on the bottom


Flip it over and tuck both ends under and crossed


Just tie the bow and voilé! So adorable, right?


Well, I am not a minimalist (I'm working hard on that, I swear!) and I had to add more. I put those earrings in a snack bag and placed a self adhesive chipboard rose on top.


And tucked it under the bow so you can see the rose peeking out. 


And there you go!


I really love how this one turned out!


Here are more things I've wrapped... 


All of these are taken from my iPhone, so the quality isn't as awesome, sorry...

Tissue flower found on Pinterest and clearance find at Target. 


Burlap sac I sewed for Christmas


I'm so in love with this Rifle Paper Co. paper I painted the card to match!


Hand stamped kraft paper and washi tape feathers.


For more gift wrap ideas follow my Pinterest board here!