Tuesday, December 16, 2014

nuepura


Hello December! You've been so kind to us this year, nice and warm (in Utah anyway!) no inversions yet, but just enough snow to get us excited for Christmas! One thing you still haven't given up on though, is drying out my skin.

Anyone else suffer from intense dryness? Every winter it sneaks up on me and before I know it I'm grasping my bleeding cracked hands in agony! I'm not a good water drinker and I'm also a germaphobe , that means I'm washing my hands constantly and not replenishing them with moisture from drinking water. It's a terrible cycle, I know! 

Every year I try a new lotion, hand mask, repair cream, and every year I'm so frustrated by how oily it is, how much it stings, or how much it just doesn't work! 

Not this year.

This year I was introduced to nuepura


Nuepura was created and developed by my cousin and friend Jodie and her fiances mom Karen. Jodie developed this after she discovered clean eating and Karen taught her that it's not just about what goes inside your body that matters, but what you also put on the outside (you can read more of Jodie's story here)! Your skin absorbs so many chemicals and harmful things into your bloodstream through the different cosmetics that we use everyday. Nuepura is a solution, a 100% pure lotion (I hesitate to use the word lotion because it is so much more than that!) full of amazing and natural ingredients like hibiscus, jojoba oil, marshmallow root,  and vitamins A C and E. No added preservatives or harmful chemicals. Your skin will just crave this!
Lemon Delight Body Lotion is an all organic 100% pure moisturizer that soothes and satisfies your skin from head to toe!

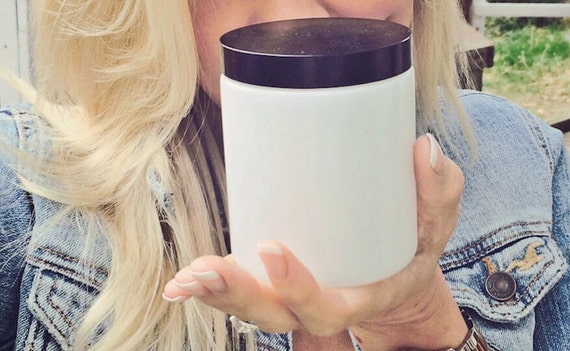
I've been using nuepura for about two months now and it is amazing! It comes in a glass jar to avoid any harmful chemicals from plastic. It's not oily, it's not thick and cumbersome and it doesn't sting! It is lightweight, replenishing and smells and feels so good! I put it on my face after I wash, I put it on my legs after I shave and throughout the day when my hands are drying out. I can't get enough of it! I finished off a whole jar already because I'm a little addicted to it (Jodie, I need more!) but a little actually does go a long way.


Jodie wanted me to tell you anything I'd like to see improved upon with nuepura but the only thing I've come up with is new ways for me to have it!! I need it in a travel version, something for my lips, and a lotion pump so I can have it at my kitchen sink. The price point is a little higher than you would normally spend on your regular ol' lotion but for me, the price is worth the relief and benefits I get and how quickly it works! Another note about the price point is that you are getting SO many amazing (and normally very expensive) ingredients packed into ONE product. Because of these ingredients this lotion can replace your wrinkle cream, stretch mark moisturizer, face cream, eye cream, after shave, face primer, body butter, etc!! It is SO many different products in one, making this extremely affordable!

If you are local to Utah and you would like an opportunity to try this amazing product out for yourself please join me for an awesome party on Friday! We'll have a few vendors (another new one I'm so excited about - more on that later), Christmas treats, and open mocktail bar, and one lucky person will be going home with an amazing prize! Here are more details:


If you are NOT local and would like your own jar of nuepura, check out her etsy shop www.etsy.com/nuepura


*I am not a doctor, professional dermatologist, or esthetician, and do not guarantee any results for individuals. Always consult your doctor before adding new products in your regimen.

**i was compensated with one free jar of nuepura to write this review, but it is a 100% honest opinion of mine. I REALLY do love this product!!!


Thursday, November 27, 2014

Give Thanks Free Printable

A little freebie for this Thanksgiving Day! Take time to give thanks...
(The background color isn't as dark as it seems here...not sure why!)
Download here

Wednesday, November 26, 2014

Happy Thanksgiving!

Thanksgiving came a little early this year for my family since two of my brothers were in town only for a couple of days at the same time. It will also be the last time we'll all be together for at least a year and a half since my little sister will serve a mission for the LDS church in January!
I couldn't have been more thrilled when my mom asked me to be in charge of place settings and decor.  I knew this had to be a big deal!
We decided to hold dinner and activities at my parents church since my siblings families have grown so much. Not my ideal place to decorate but we made it work!
 I'm not very traditional when it comes to holiday decor as my family knows (and rolls their eyes at) so I chose to work with a more elegant color palate than your normal fall oranges, browns and yellows. I absolutely love how  it turned out!


I discovered the Madhouse Collection by Michael Aram about a year ago and ordered these amazing twig plasticware sets and have been dying to use them for something since. They are close to my favorite thing at the table! Add a gold pie plate, birch straws, a simple stamped napkin and a black and gold name leaf and voile! A perfect place setting.


This, right here, is my favorite thing at the table! Me and my hubby built this simple flower box from fence wood (costing a total of about $8!) and me, my sister and sister in law filled it with pumpkins, succulents and roses. Simply breathtaking!


I love how this Oh Joy! for Target pitcher went so perfectly with the table! I had been eyeing it for a while and Thanksgiving was the perfect excuse to splurge.


Alright, here is the fun part!! I saw this downloadable set from The Caravan Shoppe a few weeks ago and fell in love! For only $10 I had an adorable set of options for a tablescape for the kids. The poster, napkin rings and table lay were all included.


I thought the kids would enjoy seeing their names on a stand and gave them all different patterned black and white straws (we saw them trading shortly before dinner, it was pretty cute!) and the napkin rings went perfectly with black and white striped napkins.


Here's an idea of the set up. Fun woodland animals under every clear plate, a turkey cookie with plain white royal icing that they got to decorate later with edible markers, and utensils including colored pencils to draw on the table.


And of course, it's not Thanksgiving without pie! Dinner was late at night so the rest of these pictures aren't as great due to lighting. I'm also still learning with my camera :D


So many pies...


Oh hello! Roses, succulents and in a pumpkin! How pretty!


A huge shoutout goes to The Alison Show and Alison's Cookie Party for helping me make these cookies perfect the first time I tried! They were a huge hit and the kids loved decorating and eating them after! Alison also did a kids table using a similar printable set from the Caravan Shoppe, you can see that here. She also gave me the idea to run out to Tai Pan Trading and get those really cute wooden circle branches! Love them to pieces!


Thanks for coming along for the Thanksgiving ride! I hope yours is wonderful tomorrow and I would love to see what you do for your Turkey Day tablescapes! Post your links below!

Tuesday, October 28, 2014

This Is Halloween!

It's almost here! The most wonderful time of the year! Halloween!!! Well in the wee world of Brittany it is anyway. I almost start to mourn the putting away of the Halloween decor the week of Halloween because I know it's coming to an end! The tears are welling up now. I'd like to take you on a mini tour of some of my Halloween decor for 2014. I hope you will be inspired. Enjoy!!


This is Winston playing the piano. My girls think he plays while we sleep!


I cut this wall mural out of black contact paper, you know the stuff you line drawers and shelves with? The crazy part is that I cut it out 4 years ago! At the end of each Halloween season I pull it off the wall and stick it to wax paper and roll it up to store until next year. It still sticks! You can see it's beginning to lift in some spots but what a cheap way to customize a blank wall for any time of year. 


Well there it is! Wave goodbye to Burton! I will shed some tears sending him to storage until next Halloween. He wouldn't look so bad dressed in a Santa suit...

Brittany


Saturday, October 11, 2014

Temple Gold Leaf Print DIY


Hi! It's Steffanie! I have been working on this project for Super Saturday coming up at my church and I thought I would share it with you! 

I am so excited to show you today how to make your own gold leaf prints! Let me just start by saying that there are several different techniques to do this but this is one I came up with after trying a couple I found. I will list the others I've seen on the bottom of this post. Also, I'd like to apologize for the poor quality pics. I was in a pinch and used my phone! I'm pretty sure the point comes across well ;-)

Supplies needed:


Electronic die cut machine with design software for the Temple silhouette (if you don't have one maybe borrow that friend or family members or sometimes pre-cut temple silhouettes are available at your local scrapbook or LDS book store. You can also find them here: https://www.etsy.com/listing/157092833/lds-temple-silhouette and you would just paint the cut out itself insted of layering like this tutorial)

Liquid gold leaf

Paint brush (foam brushes are not recommended) 

Pencil

Spray adhesive

Extra cardstock

Okay folks, let me tell you about a product that changed my life! Alright, I'm exaggerating. But not by a lot!! This beautiful bottle is something called liquid gold leaf! I feel like King Midas! I want everything GOLD! And I can make it all happen with this product!


I tried this tutorial and apparently I have no idea how to handle gold leaf sheets! So, I came up with this technique with the liquid gold leaf and it makes it is so easy! 

One thing I have learned putting together this tutorial, make sure you clean your lid THOROUGHLY after use. I had to use a large mouth wrench to pry it open! Don't let yours get crusty golden boogers like mine...  


Here's how you do it:

Line up an extra piece of card stock behind your cut out.


You may want to place another piece of paper behind that because the gold leaf turns red and can seep through to your work surface.


Take a pencil and mark the highest point


The sides


And the lowest point.


Paint on the liquid gold leaf and make sure you get all the area that would be seen. If you don't like how your brush strokes look you can buffer it a little by going over it a few more times. Be careful not to press too hard or it will pile up.


Here's what it will look like.


Place the cut out over the gold leaf


Oops! Looks like I missed a couple of spots


Next, turn over the cut out and spray lightly with adhesive. MAKE SURE YOU DON'T SPRAY THE GOLD LEAF. 


Line up the cut out carefully onto your gold leaf and voila! You have a gorgeous gold leaf temple to display!


I hope you enjoy these as much as I do. I absolutely love how this looks hanging on my wall! And the possibilities are endless on what you can do!

Here are a couple other tutorials you could try!